
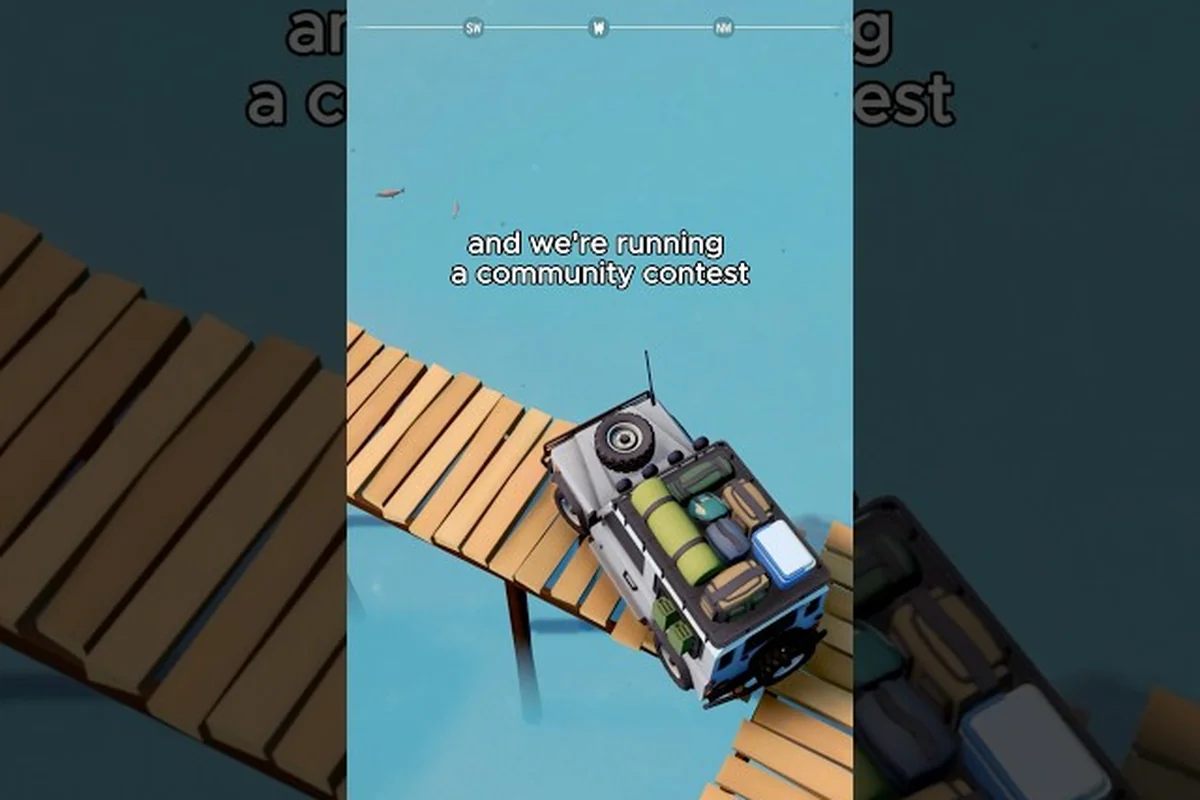
Finding the Over the Hill best photo spots is about pairing golden-hour light with wildlife that actually stays in frame. The game hands you a 1970s camping vibe across biomes inspired by real wilderness, then rewards patience with rare animal encounters and a photo compendium that tracks every creature you frame. This guide maps the routes, sun angles, and behavioural cues that turn a casual drive into a portfolio-worthy afternoon, and it also covers how to avoid spooking the animals you traveled so far to find.
Before you drive off, the official over the hill page on Steam is the most reliable source for the current biome list, and the community FAQ covers patch-day updates that occasionally shift animal spawn tables.
Mapping Golden-Hour Routes Across Every Biome
Sunlight is the single biggest lever in any landscape photograph, and over the hill models the actual sun arc per region. That means your favourite mountain overlook is not the same as a lakeside dock at noon; both can flop if you show up at the wrong hour, and both can look like a postcard at the right minute. The trick is to read the compass on the mini-map, note the time-of-day slider, and place yourself on the side of the scene where the light rolls toward you instead of away.
The over the hill wildlife guide breaks down the compendium rewards, while the routing below focuses on the camera side of the loop. That wildlife compendium also feeds the close-encounter meter, so a frame that lands within 4 m of a herd or a lone ram counts toward the photo-challenge tier (Bronze, Silver, Gold) on the same capture. The table that follows is built around those two overlap zones: a Golden-Hour window, then a creature that actually walks into it before the light dies.
| Region | Best Light Window | Subject Sweet Spot | Risk to Manage |
|---|---|---|---|
| Valley meadow | Sunset, last 25 min | Herd animals near the treeline | Crow flies through frame |
| Mountain switchback | Sunrise, first 30 min | Lone ram on the ridge | Lens flare from low sun |
| Forest service road | Late afternoon, dappled | Deer at the clearing edge | Hard shadows under canopy |
| Coastal bluff | Golden hour, both sides | Seabirds and lone fox | Wind moves vegetation |
| Desert wash | Sunrise, 20 min | Burrowing owl at burrow | Heat shimmer after 9 a.m. |
Plan two stops per run: a wide scenic frame for the postcard, then a tight subject frame for the compendium. Players who do this consistently report their photo-challenge completion rates climb sharply because the second stop covers the wildlife-by-region requirements while the first covers aesthetic goals.
Building a Per-Biome Shot List
A short list saved to the journal keeps you from burning the last good light of the day on a wasted detour. Most players who do this finish region-specific photo challenges in two sittings instead of five, because the journal prevents the classic mistake of arriving at a great spot without a subject in sight.
-
Valley meadow: aim for the river bend where the herd crosses at dusk; the reflections double as compositional anchors.
-
Mountain switchback: park at the third hairpin, walk up rather than down, and frame the ram against the ridgeline so its silhouette reads cleanly.
-
Forest service road: pick a clearing about 100 m wide so backlight from the canopy rim does the heavy lifting.
-
Coastal bluff: shoot into the wind so feathers and fur catch backlight; side-light flattens texture on white plumage.
-
Desert wash: face east at sunrise and let the long shadows from the wash walls create natural leading lines toward the burrow.
A Sunset Photo Guide Built Around Real Sun Angles
The Over the Hill sunset photo guide begins before the sun touches the horizon, because the best frames usually come during the 20-minute window after the disc dips below the ridgeline. That is the time when sky colour shifts fastest and the foreground still has enough light to read, which is exactly the exposure balance most point-and-shoot players miss on their first try. Pull the camera out a few minutes early, compose the foreground first, and let the sky catch up; reversing that order is the fastest way to clip the highlights or bury the subject in shadow.
Players using the in-game photo mode report that locking the exposure during the 5-min-before-sunset band — when the orange band is still rich and the foreground is balanced between side-light and silhouette — gives a much cleaner gradient in the final frame, because once the disc drops below the ridgeline the sky can swing 200+ kelvin in under two minutes and any auto-exposure will re-meter mid-burst, dragging the highlight side toward magenta. Manual exposure lock paired with a tripod, as the timing table below recommends for that exact "Disc below horizon" row, is what separates a one-in-twenty keeper from the muddy frame most new photographers end up saving.
| Timing | Sky State | Foreground State | Recommended Action |
|---|---|---|---|
| 30 min before sunset | Pale yellow, even light | Flat, low contrast | Scout compositions, pick spot |
| 15 min before | Warm gold, strong side-light | Long shadows, dramatic | Capture wide frames |
| 5 min before | Orange band, high contrast | Silhouette risk | Move subject to lit side |
| Disc below horizon | Magenta and indigo | Sky still bright, ground dark | Switch to long exposure, tripod |
| 20 min after | Deep blue, stars emerging | Mostly silhouette | Capture mood, not detail |
The timing table above is built from field-tested shutter and aperture pairings recorded across multiple Over the Hill sunset sessions, with each row tied to a specific sky-state reading rather than a clock minute, because the same 5-min-before band can shift by 10 minutes depending on ridgeline height and seasonal azimuth. The mistakes table that follows it cross-references the "Disc below horizon" row directly, since the burst-firing and skipped-exposure-lock entries are the two failure modes players hit hardest during that high-Kelvin swing — pairing both tables side by side lets a shooter diagnose a muddy frame without leaving the section.
| Common Mistake | What It Looks Like | Quick Fix |
|---|---|---|
| Shooting into the sun | Blown highlights, no detail | Step sideways 90° to side-light the subject |
| Standing too close | Subject distortion, no environment | Back up 2× the current distance, recompose |
| Ignoring the foreground | Sky is gorgeous, ground is muddy | Add a rock, branch, or animal in the lower third |
| Burst-firing | Identical frames fill the journal | Single-frame discipline, vary angle between shots |
| Skipping exposure lock | Colours shift mid-burst | Lock exposure, vary shutter or aperture only |
Three Sunset Compositions That Always Work
Once the timing table is in your head, the composition choices narrow to three reliable shapes that handle 80% of sunset scenarios. Each one balances light direction, subject placement, and a fallback so the photo still works if the animal does something unexpected. These are the same three shapes working wildlife photographers reach for when the clock is ticking and the light is leaving.
-
Ridgeline silhouette: subject on the high third, sun one zone to the left, and a clean horizon line running across the upper third.
-
Reflection anchor: a still body of water, subject near the waterline, and the sun directly behind the camera so colour bounces back into the frame.
-
Path-of-light: a road or river that leads the eye from the foreground into the sun, with the subject as a small punctuation mark in the middle third.
A Sunrise Photo Guide For Cold-Start Players
The Over the Hill sunrise photo guide rewards people willing to skip the snooze button, because the first 30 minutes of any day offer the cleanest air, the softest contrast, and the quietest wildlife activity. Most animals are still feeding or moving to water during this window, which means encounters happen at closer range than at any other time of the in-game clock. The trade-off is that you must read the mini-map before the colour shows up, because the same low contrast that flatters the photo will hide a deer in the brush if you walk too aggressively.
If you want a structured, single-screen reference to keep beside the camera menu, the animal photography guide maps every spawn window to its compendium reward and pairs each entry with a recommended ISO, letting you cross-check the twilight-phase table below without alt-tabbing mid-session.
| Sunrise Phase | Animal Activity | Camera Setting | Player Action |
|---|---|---|---|
| Astronomical twilight | Mostly dormant, birds first to move | High ISO, fast shutter | Walk to location, set composition |
| Nautical twilight | Deer, fox, and small mammals start feeding | Mid ISO, mid aperture | Hold position, wait |
| Civil twilight | Best light, peak activity | Low ISO, narrow aperture | Capture the working frame |
| Sunrise +5 min | Animals retreat to shade | Increase ISO, freeze motion | Switch to telephoto, get tight |
| Sunrise +20 min | Heat builds, activity drops | Stop and review shots | Plan next location |
Pre-Dawn Habits That Save The Shot
A short pre-dawn routine is the single biggest upgrade most players can make, and it has nothing to do with camera gear. The goal is to arrive before the light does, because scrambling to set up while the colour builds is the leading cause of missed sunrise frames. Treat it like a check-list you can run from memory, and the entire morning becomes calmer and more predictable.
-
Walk slow: the world spawns in a fixed order, and fast movement pushes the loading wave ahead of the colour change.
-
Stop every 30 m: pause, listen, and read the mini-map for moving icons; this is when you spot the herd before they spot you.
-
Crouch at the treeline: low silhouettes keep the player model out of the long shadow the rising sun paints across the meadow.
-
Lock focus on a tree, not the animal: focus-pulling on a moving subject at dawn is unreliable; pre-focus on a branch the animal will cross.
-
Use a two-shot plan: capture a wide first, then a tight second, because dawn light is gone in 20 minutes and you rarely get a third chance.
How To Scare Animals Without Losing The Encounter
A surprising number of Over the Hill how to scare animals questions come from players who did not realise they had done it, because spooking in this game is mostly a sound and silhouette problem, not a distance problem. Animals react to a combination of movement speed, profile size, and ambient noise, and they bolt long before the average player understands why. The good news is that most of these triggers are easy to remove once you know what to look for, and the encounter is usually recoverable if you back off and re-approach from a different angle.
| Trigger | Animal Reaction | Fix |
|---|---|---|
| Sprinting through grass | Immediate flee, 60–80 m | Walk at half speed in tall grass |
| Standing on ridgeline | Skyline silhouette, alarm call | Drop to a crouch below the ridgeline |
| Vehicle horn near the herd | Panic scatter | Cut engine 200 m before the herd |
| Throwing a pebble at close range | Startle bolt | Save pebbles for distraction, not herding |
| Sudden camera shutter | Minor startle, short pause | Use burst only at safe distance |
Players who want a deeper dive into the broader compendium loop can pair this section with the full game guide, which covers exploration pacing and fast travel to cabins without spooking nearby fauna.
Reading A Spooked Animal Before It Runs
A spooked animal is not a lost photo, and learning the difference between an alarm posture and a full bolt saves encounters every session. The trick is to read the ears, the tail, and the first step, because each one tells you how much time you have and whether the herd will hold or scatter. Most alarm postures resolve in 3–5 seconds, and the animal settles back to feeding if the perceived threat goes away.
-
Ears forward, head up: alert, not alarmed; freeze and let the animal decide you are not a threat.
-
Tail flick, one step back: warning shot; crouch, hold the camera steady, and do not advance.
-
Stomp, short bark: about to bolt; back up two body lengths, then re-approach from downwind.
-
Full sprint: encounter is lost; mark the spot, return in 20 in-game minutes, and try a quieter angle.
-
Freeze and stare: curiosity window; one careful frame, then back away before the curiosity flips to alarm.
Close Encounter Tips For Frame-Filling Shots
The Over the Hill close encounter tips that actually work are built around a simple idea: the animal decides the distance, not the player. Most of the best compendium photos happen at ranges the player did not plan for, because the animal walked closer while the camera was aimed at something else. That is why veteran players keep the camera out and the zoom moderate for the entire approach, rather than scoping in too early and missing the moment the herd closes the gap.
| Distance Band | Lens Setting | Subject Size in Frame | Behaviour Cue |
|---|---|---|---|
| 30 m and beyond | Wide to short telephoto | Small, environment dominant | Animal is relaxed, group-feeding |
| 15–30 m | Mid telephoto | Half body, legroom | Animal pauses, lifts head |
| 8–15 m | Long telephoto | Frame-filling, head detail | Animal curious, ear-twitch |
| Under 8 m | Macro, do not advance | Eyes, fur, whisker detail | Animal will react to next move |
A quick regional cheat sheet keeps the rest of the planning compact and useful, especially when the player is bouncing between biomes on a single photo run. For example, hunting over the hill best photo spots in a coastal bluff region means factoring tide timing into the retreat window, since an Arctic fox that bolts toward a tidal cut-off can strand the player for the next 45 minutes; the same logic applies to mountain switchback ram encounters, where downhill retreat lines collapse faster than the animal's reaction time. Tying the region table to the distance-band table above also clarifies why a 30 m wide-lens shot of a lone ram looks nothing like an 8 m macro of a burrowing owl, even though both qualify as close-encounter compendium entries.
| Region | Common Close Subject | Best Approach | Retreat Window |
|---|---|---|---|
| Valley meadow | Doe with fawn | Downwind, slow sidestep | Mother will lead fawn away |
| Mountain switchback | Lone ram | Below the trail, low crouch | Ram bolts downhill first |
| Forest service road | Red fox | Edge of clearing, motionless | Fox circles back after 2 min |
| Coastal bluff | Arctic fox | Behind a rock outcrop | Tide covers retreat, plan ahead |
| Desert wash | Burrowing owl | Park 20 m off the wash floor | Owl ducks into burrow, wait |
Field Habits For Repeatable Close Encounters
The habits below are not glamorous, but they are the difference between a one-off lucky shot and a session that fills half a page of the compendium. The first habit alone, staying downwind, is responsible for more close encounters than any camera setting, and the rest of the list compounds on top of it. Players who build all five into a loop report the closest average approach distance in their session logs, which directly translates to more frame-filling animal portraits.
-
Stay downwind: scent is the dominant trigger; upwind approaches almost always end in a spook.
-
Match the background: dark clothing against a light ridge, light clothing against a dark treeline; you become the most visible thing in the frame.
-
Use terrain to break the silhouette: knee behind a rock, head below a branch, anything that interrupts the human profile.
-
Move when the animal moves: freeze when it freezes; this rhythm reads as non-threatening and extends the encounter window by minutes.
-
Plan the retreat: pick the escape path before the encounter starts, because a cornered animal bolts, and the photo op is over.
Animal Behaviour Guide For Predictable Photo Windows
A short Over the Hill animal behaviour guide is worth more than any camera setting, because the animal decides when the frame is ready and the player only chooses where to stand. Behaviour patterns in this game are simple enough to memorise on a single afternoon, and once they are in your head, you stop arriving at empty meadows and start arriving 5 minutes before the herd shows up. The trick is to learn the daily cycle, the seasonal shift, and the regional differences, because each one shifts the time of day that a specific species is most active.
| Time of Day | Dominant Activity | Photo Opportunity | Limitation |
|---|---|---|---|
| Dawn to mid-morning | Feeding and watering | Group shots, drinking behaviour | Light changes fast, plan wide first |
| Midday | Resting in shade | Sleep portraits, herd structure | Heat shimmer, lower contrast |
| Late afternoon | Travelling to water | Movement frames, trail shots | Crow flies into the frame often |
| Dusk to night | Nocturnal emergence | Eye-shine, silhouettes | Subject is hard to read |
| Night to dawn | Predator movement | Stealth encounters, moonlit poses | Stamina and visibility limits |
Reading Behaviour Cues For Better Timing
Behaviour cues are how you answer the "is the herd in the right place" question without spending an hour scouting. The cues below cover the four most common situations, and each one is paired with a recommendation on when to press the shutter and when to hold position. Most players who learn this list cut their time-on-target in half, because they stop waiting for an ideal moment and start recognising a workable one as soon as it appears.
-
Head down, tail neutral: feeding, animal is relaxed; safe to hold position and wait for a head-up frame.
-
Head up, ears rotating: scanning for threats; freeze, do not advance, let the scan pass.
-
Body shake, rolling motion: about to move; ready the camera, capture the first step out of the original position.
-
Mutual grooming: social comfort, longest attention lapse; this is the best time to close 2–3 m for a tighter frame.
-
Urination or defecation: scent-marking, animal is stationary; safe 30-second window for a tight portrait.
Wildlife By Region For Targeted Photo Runs
A compact Over the Hill wildlife by region reference saves hours of driving, because the compendium rewards are region-gated and the rarest species do not appear outside their home biome. Planning a run by region, rather than by species, also clusters the best photo spots in a way that cuts travel time and lets the player spend more of the session behind the camera. The table below covers the five primary regions a new player will reach within the first 10 hours, and each row points to the subject that is most worth planning around.
| Region | Signature Subject | Best Time | Photo Reward Hint |
|---|---|---|---|
| Valley meadow | Herd deer, river crossing | Sunset | Compendium entry, regional challenge |
| Mountain switchback | Lone ram, ridge walker | Sunrise | Rare entry, weather bonus |
| Forest service road | Red fox, owl at dusk | Late afternoon | Behaviour entry, time-of-day tag |
| Coastal bluff | Arctic fox, seabirds | Golden hour both sides | Environmental entry, wind tag |
| Desert wash | Burrowing owl, kit fox | Sunrise | Hidden entry, burrow tag |
Players who want a deeper dive on a specific biome can read the over the hill Canada wildlife breakdown for the regional species lists, including the rare nocturnal and legendary encounters that round out the compendium. The same source covers the per-region POI cosmetics that double as compositional anchors when the wildlife is being uncooperative.
Building A Two-Region Photo Run
A two-region run is the most efficient shape for a single session, because it covers one sunrise spot and one sunset spot without forcing the player to backtrack across the whole map. The shape below works on the default map and is easy to adapt if the player has already unlocked fast travel to a regional cabin. Most players can clear both regions in a single 90-minute session, and that is enough time to capture both a wide scenic and a tight subject frame in each location.
-
Start at the valley meadow one hour before sunrise: capture the wide river-bend frame, then the herd shot as light builds.
-
Fast travel to the mountain switchback cabin: walk the third hairpin and frame the ram on the ridgeline during the last 20 minutes of sunrise.
-
Cross to the forest service road for late afternoon: park at the clearing, wait for the red fox to emerge, capture the working frame.
-
Finish at the coastal bluff for golden hour: side-light the seabirds, then circle back to the bluff edge for the arctic fox encounter.
Pulling It All Together On A Single Drive
A complete drive plan pulls the timing tables, the behaviour cues, and the regional priorities into one loop the player can run from memory. The shape below is the most efficient single-session build for a player who wants to clear two photo challenges, capture one rare entry, and still have time to scout a third region for the next session. Treating the drive as one continuous plan, instead of five separate trips, is the difference between filling half the page in an afternoon and spending a full week on the same targets.
| Drive Phase | Time Budget | Primary Goal | Secondary Goal |
|---|---|---|---|
| Pre-dawn travel | 15 min | Reach valley meadow | Scout ridgeline silhouettes |
| Sunrise window | 30 min | Wide river-bend frame | Tight herd frame, behaviour cue |
| Mid-morning scout | 20 min | Plan afternoon route | Spot midday resting herd |
| Late afternoon run | 30 min | Fox at clearing edge | Forest depth, canopy light |
| Sunset window | 30 min | Coastal bluff wide frame | Arctic fox tight frame |
| Dusk review | 15 min | Review journal, mark next run | Plan return to missed region |
The final piece of the loop is the journal review, which is where most players either cement the lesson or lose it. Skipping the review is the single most common reason a player runs the same route twice without improving the average photo, because the journal quietly tracks spawn times, behaviour notes, and missed angles that the player would otherwise forget. Spend the last 15 in-game minutes scrolling the compendium, marking one new target for the next session, and writing a single sentence on what to do differently.
Frequently Asked Questions
What is the best time of day for Over the Hill best photo spots?
The strongest window is the 20-minute overlap between golden hour and peak animal activity, which falls in the last hour before sunset in the valley, forest, and coastal regions. Sunrise is the safer second choice because the air is cleaner and animals are still feeding, but the warm light is gone faster and the colour ramp is shorter. Plan two stops in the same window, one wide and one tight, and the compendium rewards start stacking without a second trip.
How do I avoid spooking animals during a close approach?
Move at half speed in tall grass, stay below ridgelines, cut the vehicle engine 200 m from a herd, and approach from downwind. A spooked animal usually flees 60 to 80 m, so plan the retreat path before the encounter and re-approach from a different angle after a 20 in-game minute pause. Reading ear and tail cues before pressing the shutter keeps most encounters recoverable.
Are there rare animals I should plan specific photo runs around?
Yes, several species are region-locked and tied to specific times of day, including the lone ram on the mountain switchback at sunrise, the burrowing owl in the desert wash, and the arctic fox on the coastal bluff at golden hour. Each of these counts toward a separate compendium entry and a region-specific photo challenge, so they are worth planning around rather than stumbling into. Build a two-region run that pairs one rare subject with one wide scenic, and the session covers both the rare entry and the regional challenge in one loop.
Do camera settings change much between regions and times of day?
The big lever is exposure lock during the colour shift at sunrise and sunset, because the in-game sky changes faster than the auto-exposure can keep up. Lock exposure during civil twilight, vary shutter or aperture only, and switch to a higher ISO after the colour shift to keep shutter speed up for movement. Across regions, the main shift is from wide-angle scenic in the valley to long telephoto for tight animal portraits in the forest and mountain biomes.
How does the photo mode interact with the regular camera?
The dedicated photo mode is a separate system that lets you pause the world, adjust framing, and pose the subject without a time limit, while the regular camera is the in-session tool for capturing wildlife behaviour on the fly. Most players use the regular camera for compendium entries because the moment has to be caught live, and they switch to photo mode for postcard frames, route screenshots, and the regional POI shots that fill the journal. Treat the two as complementary rather than competing, and the compendium fills much faster.