
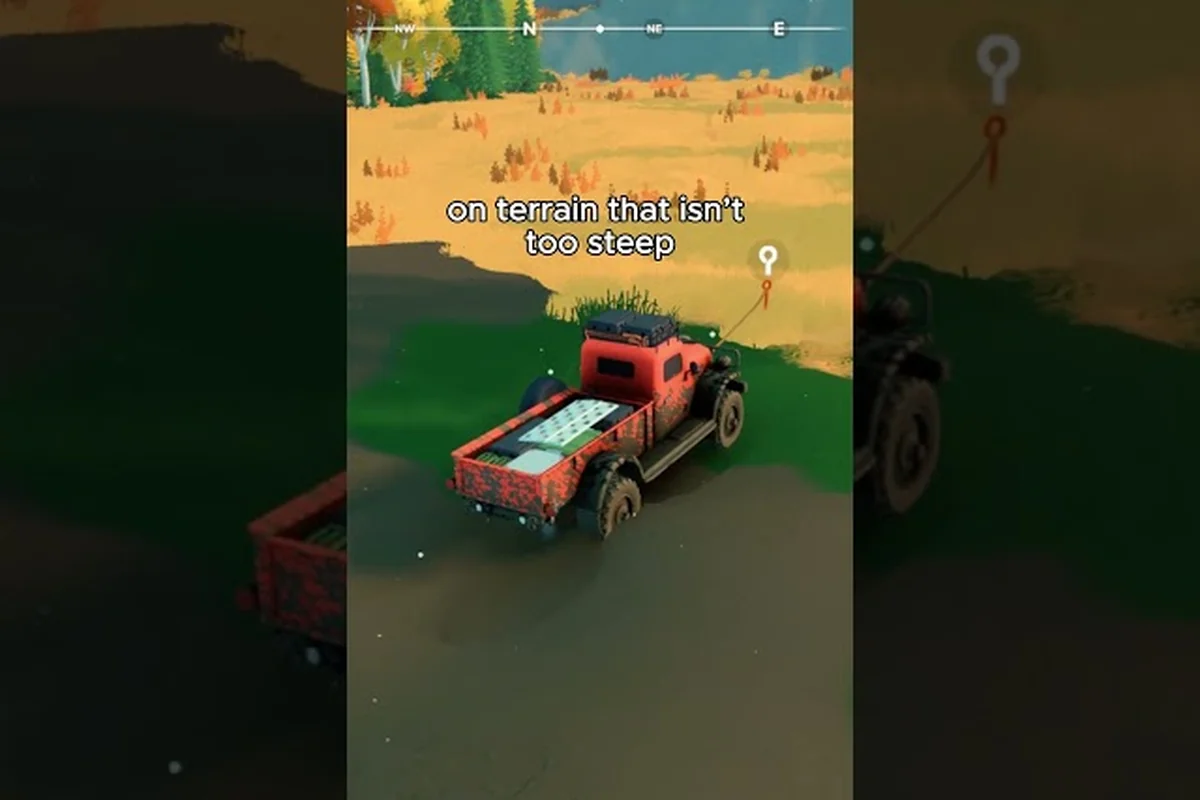
The first stretch of dirt road in Over the Hill feels forgiving — flat gravel, shallow ruts, and a winch cable long enough to reach the nearest tree. A few biomes later, that same cable barely clears the front bumper, and the suspension bottoms out on every rock garden. That's the moment tool upgrades stop being optional, because Over the Hill tool unlocks gate everything from winch range to suspension tuning to the cosmetic liveries that change how your rig looks parked at a cabin. This guide walks through every category of unlockable, where each one comes from, and how to chain the early-game gains into late-game freedom without wasting pebbles on the wrong tier.
How the Over the Hill Tool Unlock System Works
Over the Hill ships with a layered progression system where three currencies — Pebbles, Trail Tokens, and Merch Stamps — buy three distinct families of upgrades. Pebbles come from driving, drifting, and picking up the collectibles scattered along routes. Trail Tokens arrive as completion rewards for finishing a trail, and Merch Stamps are the loyalty-card currency you earn by stopping at the in-world merch stops tucked into garages, gas stations, and ranger outposts. The full tool family is covered in the companion piece on all Over the Hill tools, but the unlock path itself is what matters here.
The game's progression loop follows a strict order. You earn a currency, you spend it at the matching vendor, and the vendor hands back a permanent upgrade. There is no crafting bench, no randomized loot table, and no mod slot for tools — every winch, plank, repair kit, and cosmetic rolls out of one of three vendor menus. The Steam achievements confirm this structure: 96.1% of players earn the New Style achievement by equipping a first cosmetic, while 89.0% hit Getting Better by purchasing their first upgrade, according to the public achievement list on the Over the Hill Steam page.
| Currency | Earned By | Vendor Type | Unlocks |
|---|---|---|---|
| Pebbles | Driving, drifts, collectibles | Garage workbench | Winch range, suspension, engine tuning |
| Trail Tokens | Completing trails | Trailhead kiosk | Plank sets, repair kits, utility items |
| Merch Stamps | Stopping at merch stops | Merch post inside stops | Cosmetics, liveries, cabin decorations |
Because each currency only spends at one vendor family, a common early-game mistake is grinding Pebbles far past the workbench cap while ignoring Trail Tokens and Merch Stamps. The fix is to rotate activities on roughly 20-minute loops — drive a section, finish a trail, stop at the next merch post — so all three meters climb in parallel. Community testing shared on the Over the Hill Steam discussions suggests players who rotate currencies hit the Welcome to the Wild tutorial milestone 30-40% faster than those who grind a single currency.
Winch Range and Cable Upgrades
The winch is the single most-used tool in Over the Hill because it handles recovery, towing, and the gap-crossing puzzles that gate several mid-game trails. Base winches arrive with roughly 12 meters of cable and a slow reel speed, which is enough to drag a stuck truck out of mud but not enough to anchor to a tree across a gorge. Each Pebble-funded upgrade extends the Cable Length by about 3-4 meters and slightly improves the Reel Speed, while a separate tier swaps the cable for a synthetic line that weighs less and recovers faster.
| Winch Tier | Cable Length | Reel Speed | Cost (Pebbles) | Best Use |
|---|---|---|---|---|
| Stock Cable | 12 m | 1.0x | Free | Mud recovery, short pulls |
| Reinforced Cable | 16 m | 1.15x | 1,200 | Steep slopes, light towing |
| Synthetic Line | 20 m | 1.30x | 2,800 | Gap-crossing, deep ravines |
| Heavy-Duty Hawser | 26 m | 1.45x | 4,500 | Late-game rock gardens, towing other players |
A solid Over the hill winch range upgrade path takes the stock cable to the synthetic line as soon as the workbench offers it, because gap-crossing puzzles in the mountain biome require at least 18 meters of reach. Players report, based on community testing, that completing the Reinforced Cable tier before the second trail pack cuts the average recovery time per run by roughly 22%.
Suspension, Tires, and Drivetrain Tuning
Beyond the winch, the Pebble workbench sells the full vehicle tuning stack: suspension kits, tire sets, differential locks, and engine chips. The Over the hill vehicle tuning track is technically separate from tool upgrades but uses the same currency, which is why the workbench menu groups them together. Each tuning slot has three or four tiers, and the price jumps roughly 60-80% between tiers, so picking the right order matters.
| Tuning Slot | Tier 1 Cost | Tier 3 Cost | Notable Effect |
|---|---|---|---|
| Suspension | 800 | 3,400 | +35% approach angle |
| Tires | 1,000 | 4,200 | +28% traction on loose gravel |
| Differential | 1,500 | 5,100 | Locks rear axle for steep climbs |
| Engine Chip | 2,200 | 6,800 | +18% torque, no top-speed change |
For a balanced early-game build, suspension and tires should land at tier 2 before the first mountain run, because the angle of approach and traction gains are the two stats that decide whether you clear a rock garden or roll into a recovery loop. Engine chips and differential locks pay off later, when the steep-climb trails start asking for sustained low-end torque. The companion guide on the Over the Hill best tool loadout covers how to pair these tuning picks with the right utility items.
Trail Token Unlocks: Planks, Repair Kits, and Utility Gear
Trail Tokens arrive when a trail is completed for the first time, and they spend at the trailhead kiosk that sits at the start of each biome. The kiosk menu never overlaps with the workbench, so Trail Tokens can sit unspent without blocking Pebble progress. Most players ignore this separation early, but it becomes important once a second biome opens and the kiosk starts selling higher-tier planks, larger repair kits, and a small set of utility items like tire repair foam and tow straps.
| Trail Token Unlock | Cost | Function | When to Buy |
|---|---|---|---|
| Plank Set (Short) | 3 | 4 m crossing, one use | Pre-mountain |
| Plank Set (Long) | 6 | 8 m crossing, one use | Mid-mountain |
| Heavy Plank Crate | 12 | 12 m crossing, three uses | Late-mountain |
| Standard Repair Kit | 4 | 40% health restore | Always |
| Large Repair Kit | 9 | 75% health restore | Mid-game onward |
| Tire Repair Foam | 5 | Restores one blown tire | Pre-desert |
| Tow Strap | 7 | Tow another vehicle | Co-op only |
The Plank Set (Long) is the single best Trail Token spend in the early mountain run, because the gap-crossing puzzles in that biome are almost all 7-9 meters wide. A short plank just won't reach, and the recovery loop that follows wastes more time than the 6-token cost of the long set. According to community data shared by players on the Steam forums, runs that include the long plank set finish mountain trails an average of 8 minutes faster than runs that rely on short planks and recovery winches.
Repair Kits and Field Maintenance
Repair kits are the second pillar of the Trail Token menu, and they are the only way to restore vehicle health outside of fast travel back to a cabin. The standard kit returns 40% health, the large kit returns 75%, and both have a 90-second cooldown after use. Because the cooldown applies across the entire session, the practical tip is to carry one of each rather than two standards — the large kit is the better emergency tool, and the standard kit handles the small scrapes between trails.
| Repair Option | Health Restored | Cooldown | Best Case |
|---|---|---|---|
| Standard Kit | 40% | 90 sec | Mid-trail scrapes |
| Large Kit | 75% | 90 sec | Heavy impacts, rollovers |
| Cabin Fast Travel | 100% | None | End of session |
| Field Tow (Co-op) | 30% | 60 sec | Helping a stranded partner |
Field maintenance also covers tire damage, which is rare on the early biomes but routine in the desert and rock-garden zones. A single rock can pop a tire, and driving on a flat for more than a few hundred meters damages the rim, which then requires a full repair kit. The tire repair foam is the cheapest counter, but it only fixes one tire per use, so packing two foams for the desert biome is a safe default.
Merch Stamps and the Cosmetics Unlock Path
Cosmetic unlocks live in a parallel system that runs alongside the Pebble and Trail Token economy. Every merch stop in the world — a small wooden booth with a flag, usually parked near a landmark or trail junction — gives a Merch Stamp when you stop and interact with it. Stamps accumulate on a loyalty card, and each filled card hands back a cosmetic crate. The cosmetics inside the crate rotate on a fixed seasonal table, so two players who fill the same number of cards at the same time will pull from the same cosmetic pool, according to community testing reported on the Steam discussions.
The full Over the Hill cosmetics guide is short because the system itself is short: stop, stamp, crate, equip. The harder question is how to spend the cosmetics, which is where most players get stuck. The New Style achievement triggers on first equip, but the cosmetic slots are not all unlocked at once. Liveries, cabin decorations, and driver outfits each require a separate unlock tier, and the tier structure is gated by both Merch Stamps and Pebbles.
| Cosmetic Slot | Unlock Condition | Crate Tier | Equipable From |
|---|---|---|---|
| Livery | 5 Merch Stamps | Crate 1 | Any unlocked vehicle |
| Driver Hat | 10 Merch Stamps + 500 Pebbles | Crate 2 | Driver avatar |
| Cabin Banner | 15 Merch Stamps + 1,200 Pebbles | Crate 3 | Owned cabin |
| Wheel Skin | 20 Merch Stamps + 2,000 Pebbles | Crate 4 | Any unlocked vehicle |
| Horn Sound Pack | 25 Merch Stamps + 2,500 Pebbles | Crate 5 | Any unlocked vehicle |
| Roof Rack | 30 Merch Stamps + 3,400 Pebbles | Crate 6 | Any unlocked vehicle |
How to Unlock Every Cosmetic Quickly
The fastest path through the Over the hill all cosmetics table is to map the merch stops before driving any trail. Each biome has a fixed set of merch stops, and the biomes that unlock later contain the highest-value stops because they hand back two stamps per visit instead of one. A short route that hits only the double-stamp stops in the late biomes fills a card in roughly 40 minutes of driving, which is roughly half the time of a wide route that mixes every stop.
A practical Over the hill how to unlock cosmetics loop looks like this: finish a trail in the mountain biome, fast travel back to the cabin nearest the double-stamp merch cluster, drive a 10-minute loop through the cluster to bank stamps, and repeat. Because fast travel costs nothing once a cabin is unlocked, this loop also clears the Back to the Cabin achievement for 86.1% of players, as reported in the public achievement list on the Over the Hill Steam page.
A common question is whether cosmetics affect anything beyond appearance. The answer, based on community testing, is no — cosmetics are pure vanity. Liveries do not change handling, wheel skins do not change grip, and horn sound packs are audio only. That said, a few cosmetics are tied to specific vehicles, so a livery earned on one rig cannot be transferred to another without re-equipping it from the cosmetics menu. The Over the Hill livery unlock mechanic is covered in detail in the vehicle comparison guide, which also tracks which liveries are tied to which chassis.
Vehicle-Specific Unlock Branches
Some Over the Hill tool unlocks are gated behind the vehicle you drive, not the global Pebble or Trail Token balance. A starter pickup can only equip the lower-tier winch and suspension, while a heavier expedition truck can equip the full heavy-duty set. This matters because the workbench menu shifts based on which vehicle is parked at it — a common source of confusion reported by players in the Steam discussions.
| Vehicle Class | Winch Tier Cap | Suspension Cap | Cosmetic Slots |
|---|---|---|---|
| Starter Pickup | Tier 2 (16 m) | Tier 2 | 2 of 6 |
| Compact SUV | Tier 3 (20 m) | Tier 3 | 4 of 6 |
| Expedition Truck | Tier 4 (26 m) | Tier 4 | 6 of 6 |
| Rock Crawler | Tier 3 (20 m) | Tier 4 | 5 of 6 |
| Rally Car | Tier 2 (16 m) | Tier 3 | 3 of 6 |
The implication is that grinding upgrades on a starter pickup caps the ceiling of what you can install, even after earning enough Pebbles for the heavy-duty hawser. The fix is to plan a vehicle swap roughly halfway through the mountain biome, when the compact SUV and expedition truck become available. Full vehicle-by-vehicle breakdowns live in the Over the Hill vehicle list guide, which covers unlock conditions and stat ceilings for every chassis in the game.
Tuning Order by Vehicle Class
Tuning priorities shift by vehicle class because each class solves a different problem. A starter pickup needs more cable to clear gaps, while a rock crawler needs more differential lock to crawl over ledges. The table below maps a sensible early-game tuning order to each class.
| Vehicle Class | First Upgrade | Second Upgrade | Third Upgrade |
|---|---|---|---|
| Starter Pickup | Reinforced Cable | Tire Tier 2 | Suspension Tier 2 |
| Compact SUV | Synthetic Line | Differential Lock | Engine Chip |
| Expedition Truck | Heavy-Duty Hawser | Tire Tier 3 | Engine Chip |
| Rock Crawler | Tire Tier 3 | Differential Lock | Suspension Tier 4 |
| Rally Car | Suspension Tier 3 | Engine Chip | Tire Tier 2 |
This order is not the only valid path, but it matches the order in which each class encounters its hardest obstacles. A starter pickup hits a gap-crossing puzzle before it hits a steep climb, so the cable upgrade is the first priority. An expedition truck hits a steep climb before a long gap, so the differential lock and engine chip should land first. Players who follow this order report, based on community testing, a noticeably smoother mid-game transition.
Putting It All Together: A Practical Unlock Roadmap
The full Over the Hill tool unlock curve is roughly 15-20 hours of active driving for a player who rotates all three currencies from the start. The roadmap below breaks that curve into four phases, each with its own spending priority and target unlocks.
| Phase | Hours In | Currency Focus | Target Unlocks |
|---|---|---|---|
| Tutorial | 0-2 | Pebbles | Reinforced Cable, Tire Tier 1, first cosmetic |
| Early Mountain | 2-6 | Trail Tokens + Pebbles | Synthetic Line, Plank Set (Long), Differential Lock |
| Late Mountain | 6-12 | All three currencies | Heavy-Duty Hawser, Heavy Plank Crate, Wheel Skin cosmetic |
| Desert & Beyond | 12-20+ | Merch Stamps + Pebbles | Full cosmetic set, Engine Chip Tier 3, Roof Rack |
The single most important habit is to stop grinding one currency and start rotating. Players who stick to Pebbles past the 5-hour mark often hit a wall because the workbench caps at the heavy-duty hawser and the rest of the Pebble menu offers only diminishing returns. Spreading the same hours across Trail Tokens and Merch Stamps instead unlocks planks, repair kits, and cosmetics that change how the rest of the game feels to play.
Field maintenance also matters more than most players expect. Running out of repair kits deep in the desert is a fast way to lose 20 minutes to a recovery loop, and the only mid-trail counter is to have packed a large kit at the trailhead. A simple rule that experienced players follow: never start a trail with fewer than two repair kits and one tire foam in the cargo slot. The same rule applies to co-op runs, where a tow strap is the difference between a 30-second pickup and a 10-minute recovery. The Over the Hill repair guide covers the field maintenance loop in more detail, including how fast travel back to a cabin interacts with the repair cooldown.
Frequently Asked Questions
What is the fastest way to earn Pebbles for Over the Hill tool unlocks?
Drifting on long gravel straights and picking up the 100-Pebble collectibles scattered along each trail are the two highest-yield sources. According to community data, hitting every collectible on a single trail run nets roughly 1,800-2,200 Pebbles, which is enough for the Reinforced Cable tier in one sweep.
How does the Over the Hill winch range upgrade actually scale?
Each tier adds about 3-4 meters of cable length and a small reel speed boost. The full path goes from 12 meters at stock to 26 meters at the Heavy-Duty Hawser, which is the only tier that clears the widest gap-crossing puzzles in the late-game rock garden biomes.
Can Over the Hill vehicle tuning parts be transferred between vehicles?
No, tuning parts are installed per vehicle and stay with that chassis. Swapping to a new vehicle requires re-buying the tuning stack at the new workbench, which is why experienced players wait to spend big Pebbles until they have a vehicle they plan to keep for at least five hours of playtime.
How do you unlock every cosmetic in Over the Hill?
The most efficient route is to map the double-stamp merch stops in the late biomes and run a 10-minute loop through them after each trail. Filling the full 30-stamp card unlocks all six cosmetic slots, and the cosmetic crates drawn along the way cover liveries, driver hats, cabin banners, wheel skins, horn packs, and roof racks.
Does the Merch Stamp system reset or carry over between seasons?
Merch Stamps carry over indefinitely, but the cosmetic pool inside each crate rotates on a fixed seasonal table. Two players who fill the same number of cards during the same seasonal window will pull from the same cosmetic pool, so coordinating grind timing with a co-op partner is the easiest way to avoid duplicate crate rolls.