
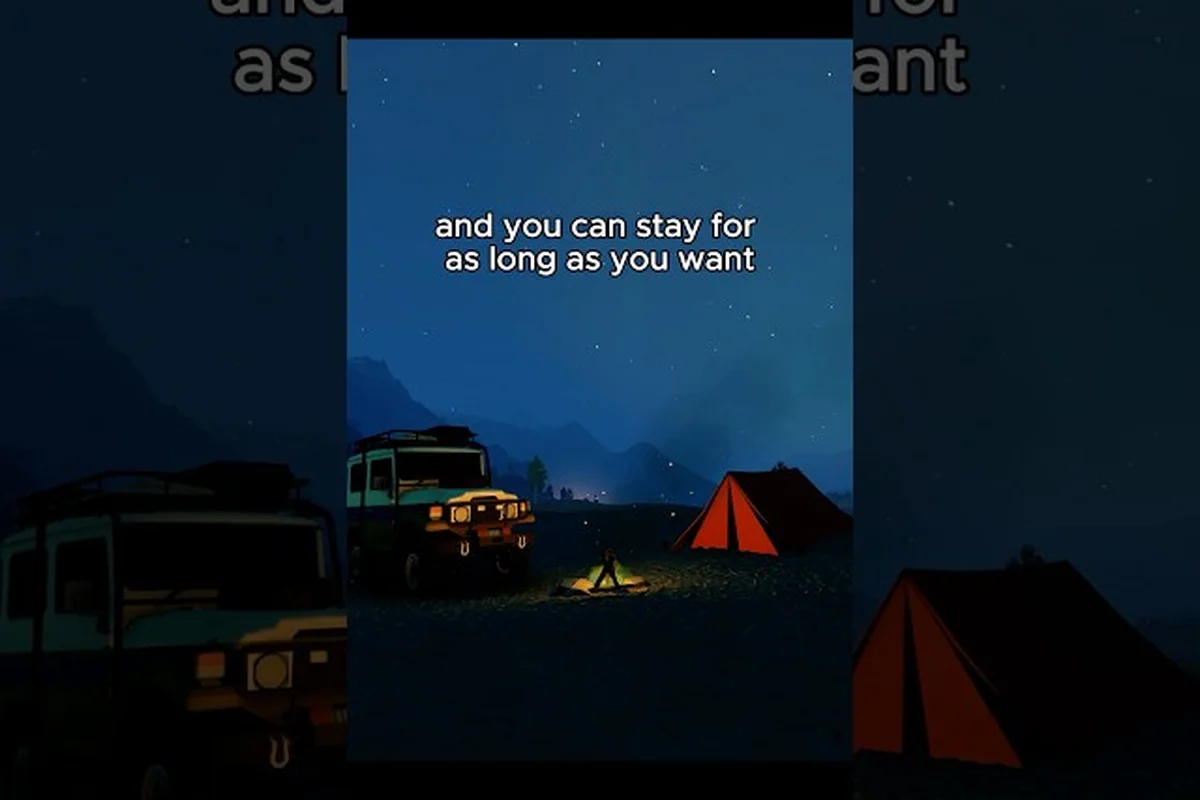
Setting up camp in over the hill sits at the center of the whole road trip, because every run eventually loops back to a fireplace, a cassette deck, and a row of upgrade options on the cabin workbench. The campfire is more than a save point — it is the single hub where music gets swapped, weather tools get swapped in, and pebbles turn into permanent vehicle and gear improvements. This over the hill camping guide walks through the three systems that matter most at a campsite: the act of pitching camp itself, the cassette player that drives the mood, and the upgrade economy that decides whether the next trail feels punishing or easy. Players who treat the campfire as a real planning stop rather than a loading screen tend to progress through the biomes faster, simply because they arrive at each climb with the right tool equipped, the right track queued, and the right stats already paid for.
The cabins in over the hill are scattered across every region, which means camping is rarely a deliberate detour — it is something the game nudges you toward after every long run. Knowing what to do once you are standing next to the fire turns ten-minute stops into real preparation for the next stretch. The rest of this guide breaks down setup steps, music controls, weather tools, and upgrade costs so that each campfire visit feels productive instead of routine.
How to Set Up Camp and What Happens at the Fire
The first decision every player makes on a new run is figuring out how to set up camp, and the process is intentionally lightweight. You drive (or walk) up to a discovered cabin, park nearby, and the game enters a soft "camp mode" once you interact with the fire ring. From there the cabin becomes a fast-travel point, a save anchor, and a shop. According to the official over the hill Steam store page, the cabins are placed in varied biomes inspired by real-world locations, which is why some fires are tucked under dense forest canopies while others sit on exposed ridges — the surroundings are part of the atmosphere, not decoration.
The cabin interaction also unlocks the Back to the Cabin fast-travel option, and community data from the Steam achievements tracker shows that 86.1% of players have already used this feature, which means most trips are designed to loop back to a known fire rather than push forward blindly. Once camp mode is active, three menus become available: the cassette deck on the porch, the workbench against the wall, and the weather tool rack by the door.
| Campfire Action | What It Does | When to Use It |
|---|---|---|
| Set up camp | Triggers camp mode, fast-travel unlock, save | After every long run or before a difficult trail |
| Cassette deck | Plays / queues a track from your library | When you want a different mood for the next leg |
| Workbench | Spends pebbles on vehicle & gear upgrades | When you have saved up 200+ pebbles |
| Weather tool rack | Swaps the active weather instrument | Before a foggy valley or a rainy pass |
| Map table | Reviews discovered routes and POIs | When planning a multi-segment expedition |
A useful habit is to chain all five actions during one stop. Most players do not realize the map table also marks which cabins have already been "discovered" — a soft achievement in itself, because revisiting a known fire restores your condition faster than an unknown one. The campfire is also the only place where the Dirt Baptism trail-completion tally rolls up, so stopping regularly keeps the meta-progression moving.
Why Camp Placement Matters
Not every cabin is equal, and the placement of a fire changes what tools you actually need. A fire on a coastal slope usually demands a winch and good tyres before you can even reach it, while a fire in a flat pine valley is reachable with stock gear. This is why early-game players report a soft "wall" around the second biome — the cabin itself is the gate, and your camping choices earlier determine which ones are unlocked. The campsite you can reach becomes the campsite you rely on, and the campsite you rely on becomes the loadout hub for every later run. Players who want a deeper breakdown of how cabin unlocks tie into the broader upgrade economy should check out the over the hill tool unlocks reference, which maps each region to the tools required to reach its cabins.
The Cassette Player and How to Change Music
The cassette player is one of over the hill's most charming systems, and it is more than ambient flavor. The deck is a real in-game device that lives on every cabin porch, and it is the only way to control the soundtrack of your current run. According to the pinned official FAQ on the over the hill Steam discussions, the soundtrack is also available as a separate $9.99 USD purchase, but every track included on the soundtrack disc is also already unlockable in-game through normal play, which means the cassette player is essentially a free jukebox if you are willing to earn the tapes.
The mechanics are simple. You approach the deck, press the interaction button, and a small radial menu appears with every cassette you currently own. Select a tape, and the music changes for as long as you stay at the cabin — and, depending on the tape, sometimes for the rest of the run. The cassette player is also the only place where you can preview a track before committing to it for the next leg, which is helpful for players who want a calm tape on a long highway and a faster one on a technical climb.
How to Change Music Mid-Run
-
Return to the nearest cabin and swap the tape in the deck. This is the most reliable method and the one the in-game tutorial points to.
-
Find an abandoned radio in the world. Community testing on the Steam forums suggests these are scattered along secondary trails, and they automatically override the cabin tape for the rest of the run.
-
Equip a music-themed cosmetic (see the over the hill upgrades guide for unlock paths). Some cosmetics carry a passive "preferred track" effect that subtly biases the cassette player toward a specific tape when you reload at a cabin.
There are three reliable ways to change what is playing without driving all the way back to a cabin: Each approach has a different feel. Returning to a cabin is the most "designed" method and triggers the full camp cutscene. Abandoned radios feel like a discovery reward. Cosmetic-driven swaps are subtle but useful for players who want a specific mood to feel default without thinking about it. The table below compares all three at a glance.
| Method | Cost | Speed | Best For |
|---|---|---|---|
| Return to cabin | Free | ~1 minute round trip | Players who want a deliberate mood change |
| Abandoned radio | Free | Instant (in-world) | Players who stumble onto one mid-run |
| Cosmetic passive | Pebble cost upfront | Automatic | Players who want a permanent default vibe |
A practical tip: the cassette player does not pause the world. You can still browse the workbench or change weather tools while a track is playing, and the music persists through the menu. This makes camp stops feel cinematic rather than interruptive, and it is one of the small design touches that the Steam community threads cite when explaining why the game "feels relaxed" even during tense climbs.
Weather Tools and How They Affect Every Run
Weather tools are the quietest but most strategically important upgrade category, because they change what information you have on screen rather than what your vehicle can do. The over the hill weather tools cover three broad families: forecast instruments that show upcoming conditions, visibility aids for fog and storm biomes, and terrain readers that highlight slope and traction. Each family is unlocked at the campfire workbench, and each one costs a different amount of pebbles depending on the tier.
The reason weather tools matter so much is biome design. The game ships with biomes that range from sunny valleys to rain-soaked highlands, and the difficulty curve is built around weather transitions rather than enemy encounters. A fog belt in the third biome is essentially impassable without a visibility aid, and a rainy descent becomes a controlled slide without a proper terrain reader. Players who skip these tools tend to blame the vehicle when the real bottleneck is information.
| Weather Tool Family | Primary Use | Approx. Pebble Cost (per tier) | Best Biome Match |
|---|---|---|---|
| Forecast instrument | Shows 60-second weather preview | 150 / 300 / 600 | Mixed-climate valleys |
| Visibility aid | Highlights path through fog | 200 / 400 / 800 | Coastal & mountain fog belts |
| Terrain reader | Displays slope and traction HUD | 250 / 500 / 1000 | Rainy highland descents |
| Wind vane | Warns about crosswind gusts | 100 / 200 / 400 | Open plateau crossings |
Pebble costs are reported by players on the Steam community boards and may vary by patch, so treat them as planning estimates rather than fixed prices. The official FAQ does not list a hard price sheet, which is why community-sourced numbers like these are the best reference currently available.
How to Decide Which Weather Tool to Buy First
The "first tool" decision usually comes down to which biome you are about to enter next. If the next region is fog-heavy, the visibility aid is the obvious pick because no amount of engine tuning helps when you cannot see the trail. If the next region is a long plateau with open sky, the wind vane is cheaper and prevents a different kind of wipe — the crosswind gust that pushes a light vehicle off the road. A good rule of thumb is to buy the tool that solves the failure mode you keep hitting, not the one that sounds most powerful in the abstract.
Players who want a deeper look at how the weather tools interact with the winch and planks should check the over the hill all tools overview, which breaks down every utility item you can carry and how it complements the campfire loadout.
Upgrade Costs and What to Spend Pebbles On
Pebbles are the only soft currency in over the hill, and every meaningful purchase at the campfire workbench is denominated in them. The economy is intentionally narrow: there are no microtransactions, no premium shop, and no second currency. Everything from engine upgrades to cassette unlocks to cosmetic name tags is paid for out of the same pebble wallet, which means the question "what should I spend on first" is genuinely important.
The most common early-game trap is to dump pebbles into cosmetic items because they have the most visible payoff. The New Style achievement — equipping your first cosmetic — is unlocked by 96.1% of players according to the over the hill Steam achievement tracker, which means most people make this purchase very early. It looks great, but it does not help on a wet descent. A smarter early priority is to keep the first 300-500 pebbles reserved for a tier-1 engine or tyre upgrade, which translates directly into fewer wipeouts on the second biome.
| Upgrade Category | Tier 1 Cost | Tier 2 Cost | Tier 3 Cost | Real Impact |
|---|---|---|---|---|
| Engine | 200 | 500 | 1000 | Hill-climb speed, recovery from stalls |
| Tyres | 250 | 550 | 1100 | Traction on wet grass, sand, and gravel |
| Suspension | 300 | 600 | 1200 | Crash recovery, landing stability |
| Cosmetic | 100-400 | varies | varies | Visual only — no stat change |
| Cassette unlock | 150 | 300 | 600 | New music track for the deck |
| Weather tool | 100-250 | 200-500 | 400-1000 | Information HUD, visibility, traction |
A Practical Pebble Budget for New Players
-
Hour 1-2: Save all pebbles. Focus on completing the A Handful of Pebbles achievement (collect 100 pebbles) — 82.8% of players earn this naturally without grinding, which is a good signal that the economy is generous if you avoid spending early.
-
Hour 3-5: Buy a tier-1 engine or tyre upgrade, depending on which biome is hardest. The Getting Better achievement (purchase your first upgrade) is unlocked by 89.0% of players, suggesting most people make this purchase within the first few hours.
-
Hour 6-10: Unlock a second cassette for mood variety, and start pricing a tier-1 weather tool for the next biome. Avoid cosmetics until the engine and weather tools are at least tier-1.
-
After hour 10: Pebble income is high enough to mix stat upgrades with cosmetic experiments. By this point you should have a clear sense of which biomes you struggle in, and you can start spending toward the tools that solve those specific problems.
A reasonable spending plan for the first five to ten hours looks like this: The key insight is that pebbles are a pacing system, not a progression barrier. The game does not lock content behind a hard grind, and the official FAQ confirms that the Supporter Pack is a purely optional cosmetic bundle. Spending pebbles with intent — solving the failure mode you actually have — is the most efficient path through the upgrade tree. For a more detailed priority breakdown, the over the hill best tool loadout reference is a good companion read.
Tips for Getting the Most Out of Every Campfire Visit
Once you understand the three core systems — camp setup, cassette player, and upgrades — the next step is to build habits that make every campfire visit feel efficient. The list below is the short version; the explanations are the long version.
-
Always swap the cassette before leaving camp. Even if the new track is not your favorite, varying the music keeps the road trip feeling fresh, and the cassette player is the cheapest mood tool in the game.
-
Review the map table before driving out. Players who check discovered routes and POIs at the cabin tend to plan more efficient loops, which means fewer dead-end detours and more pebbles earned per hour.
-
Buy one stat upgrade per zone rather than saving up for a single big purchase. The tier-1 versions of engine, tyres, and suspension are cheap enough that spreading them out gives you a balanced vehicle, while dumping everything into one category leaves other failure modes unsolved.
-
Match the weather tool to the next biome rather than the current one. A common mistake is buying a fog tool while still in a sunny valley, only to realize the pebbles would have been better spent on a wind vane for the next plateau.
-
Keep at least 100 pebbles in reserve for an emergency repair kit. The cabin workbench is the fastest place to restock consumables, and a small reserve prevents the kind of forced backtrack that breaks a long run.
| Habit | Cost Saving | Time Saving | Mood Boost |
|---|---|---|---|
| Swap cassette every stop | None | None | High |
| Review map table | Medium | High | Low |
| Spread stat upgrades | Low | Medium | Low |
| Match weather tool to next biome | High | High | Medium |
| Keep a pebble reserve | Medium | High | Low |
The reason these habits matter is that over the hill is a long, slow game. The Steam community threads describe it as a "ramble" rather than a race, and the achievement data backs this up — the rare achievements are not skill checks, they are exploration and collection milestones. Players who treat the campfire as a real planning stop, rather than a fast-travel loading screen, get more out of every hour because they arrive at the next trail with the right tool, the right music, and the right vehicle state.
Wrapping Up the Camping Loop
The campfire loop — drive, return, swap, upgrade, drive again — is the spine of every run in over the hill, and mastering it is the single biggest quality-of-life improvement a new player can make. The act of pitching camp is quick, the cassette player is the cheapest mood tool in the game, the weather tools are the most strategically important upgrades, and the pebble economy rewards players who plan one biome ahead instead of spending reactively. None of these systems are hidden, but they are easy to overlook in the first few hours because the road itself is so inviting. Once the campfire stops feeling like a save point and starts feeling like a loadout screen, every subsequent run becomes faster, calmer, and more rewarding.
The rest of the upgrade tree — vehicles, winches, planks, repair kits — builds on the foundation the campfire provides. A tier-1 engine means nothing if the next fog belt is impassable, and a beautiful cosmetic means nothing if the descent is uncontrollable. The cabin is where those decisions get made, which is why the camping system is worth the attention.
Frequently Asked Questions
How do I set up camp in over the hill for the first time?
Drive or walk to a discovered cabin, approach the fire ring, and press the interact button to enter camp mode. The cabin becomes a fast-travel point, a save anchor, and a workbench, and you can access the cassette deck, weather tool rack, and upgrade menu from the same screen. Community data shows that 86.1% of players use the Back to the Cabin fast-travel option regularly, so the first campfire is meant to be a recurring stop rather than a one-time event.
How does the over the hill cassette player work and how do I change music?
The cassette player is a real in-game device on every cabin porch, and you swap tracks by interacting with the deck and selecting from the tapes you have unlocked. You can also change the music by finding an abandoned radio in the world, or by equipping a cosmetic that carries a passive track preference. The full soundtrack is also available as a standalone $9.99 USD purchase, but every track is unlockable in-game through normal play according to the official pinned FAQ.
What are the best weather tools to buy first in over the hill?
The best first weather tool depends on the next biome you are entering. If the next region is fog-heavy, the visibility aid is the priority because no vehicle upgrade helps when you cannot see the trail. If the next region is an open plateau, the cheaper wind vane solves crosswind wipes for a lower pebble cost. According to community testing on the Steam forums, the tier-1 versions of these tools cost roughly 100-250 pebbles, which is low enough to buy before any cosmetic item.
How much do over the hill upgrades cost at the campfire workbench?
Pebble costs vary by category and tier. Tier-1 engine upgrades cost around 200 pebbles, tier-1 tyres around 250, and tier-1 suspension around 300. Weather tools range from 100-250 at tier 1, cassette unlocks cost 150, and cosmetics range from 100-400. These numbers come from community testing and may shift with patches, so treat them as planning estimates rather than fixed prices. The official FAQ does not publish a hard price sheet, which is why player-reported data is the most reliable current reference.
Can I respec my over the hill upgrades later if I spend pebbles wrong?
There is no full respec system in the base game, so spending pebbles on the wrong upgrade category is a real cost. The smartest approach is to keep the first 300-500 pebbles reserved for a tier-1 stat upgrade, and to avoid cosmetic purchases until the engine and weather tools are at least tier-1. The game is generous with pebbles — 82.8% of players collect 100 without grinding — so patience early on is the most efficient long-term strategy.