
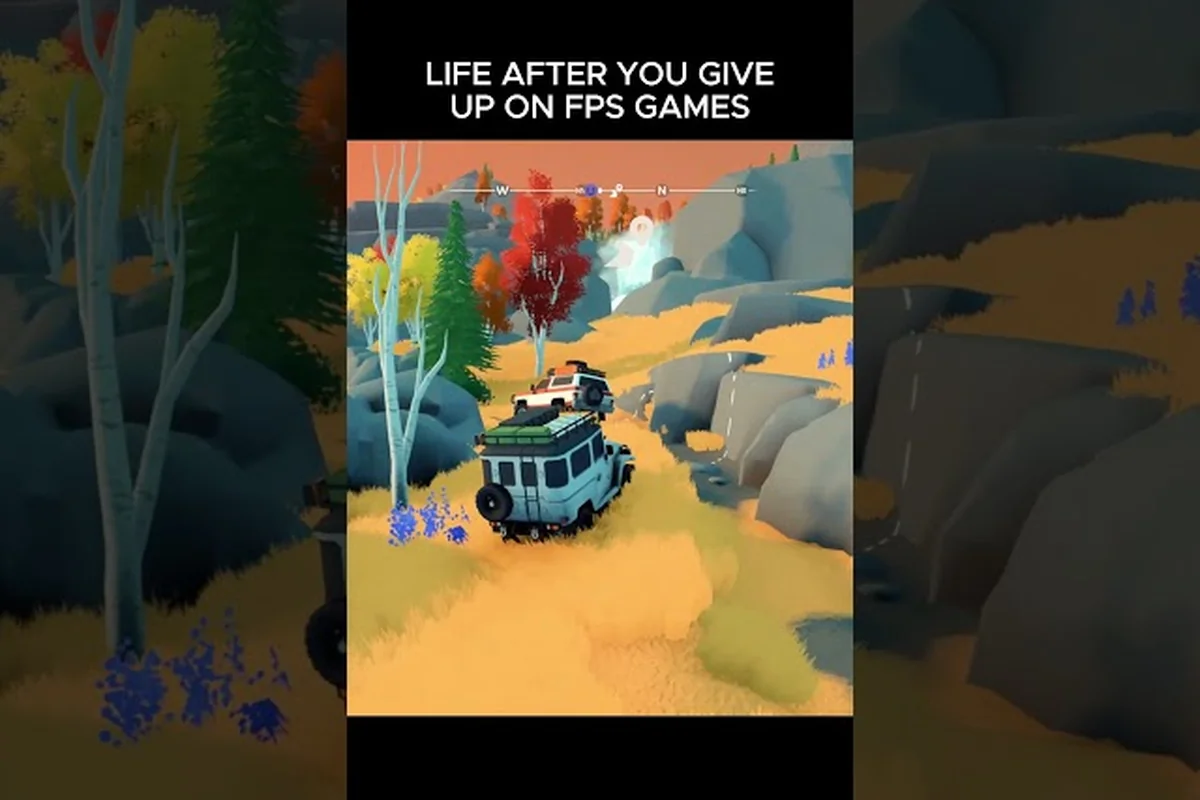
Tackling the toughest terrain in over the hill demands more than a steady throttle; it calls for a complete Over the Hill hard trails guide mindset built on careful planning, sharp map reading, and deliberate driving. The hardest routes push every system in the game to its limit, so the right preparation separates a clean summit run from a four-wheeled tumble back to the trailhead. This guide collects the route planning tactics, map reading cues, and advanced driving techniques that experienced drivers use to clear the roughest ascents in over the hill.
Understanding the Hard Trail Tier
The hardest routes in over the hill sit in their own difficulty bracket, and they require a different mental model than the gentle starter trails. Trail difficulty is dictated by three primary variables: vertical grade, surface consistency, and obstacle density. Hard trails typically combine all three into a punishing sequence that punishes any lapse in throttle control or route choice. Knowing exactly what makes a trail hard is the foundation of effective route planning, because the same skills that make an easy trail trivial will fail badly on a technical climb.
How Difficulty Is Calculated
Each trail in over the hill is graded using a blend of gradient measurement, surface friction estimates, and obstacle spacing. The community has reverse-engineered this grading using shared telemetry, and the breakdown below reflects the most commonly reported brackets.
| Difficulty Tier | Avg Gradient | Surface Type | Obstacle Spacing | Recovery Window |
|---|---|---|---|---|
| Easy | 8-12% | Packed dirt, short grass | Wide (40m+) | Long, forgiving |
| Medium | 13-20% | Loose gravel, mud patches | Moderate (20-40m) | Moderate |
| Hard | 21-32% | Mixed rock, deep ruts, roots | Tight (8-20m) | Short, punishing |
| Expert | 33%+ | Loose shale, water crossings | Very tight (under 8m) | Brutal, no margin |
Hard trails cluster in the 21-32% gradient range, with mixed surface friction that constantly shifts under the tires. Obstacles on these routes appear in clusters rather than evenly spaced, which means a driver who only checks the next corner is already planning too late. According to the official over the hill page on Steam, the game ships with co-op support for up to three friends alongside the solo experience, and the same winch and plank equipment mentioned in that description is what unlocks the hardest routes.
Why Hard Trails Break Average Drivers
The community has identified three consistent failure points on hard routes. First, drivers underestimate momentum loss on climbs, and they arrive at the next obstacle below the speed they need to clear it. Second, drivers treat winch points as a safety net rather than a route feature, missing the opportunity to use the winch as a primary navigation tool. Third, drivers rely on the in-game compass instead of reading the actual terrain contours, which causes them to pick the steepest line rather than the safest one. Each of these failures cascades into the next, and the result is usually a long recovery that costs far more time than a careful approach would have taken.
Map Reading and Route Planning Foundations
Strong map reading is the single biggest force multiplier for hard trails. The over the hill map is layered with contour shading, trail waypoints, and iconography that signal terrain hazards long before a driver reaches them. Route planning built on those visual cues turns an intimidating climb into a sequence of manageable segments, and the same planning process doubles as a recovery strategy if a run goes wrong mid-trail.
Decoding the Map Interface
The map screen in over the hill is the single most important planning tool in the game, and players who skip its details almost always burn more fuel and time than they save. Below is a breakdown of the icons and shading every hard-trail driver should recognize before departure.
| Map Element | What It Shows | How to Use It |
|---|---|---|
| Contour lines | Elevation change over distance | Tighter lines = steeper climb, plan winch points in advance |
| Yellow dashed path | Suggested trail route | Trust as baseline, but check for hazard icons along the way |
| Red triangle icons | Rockfall or roll zones | Approach from below, never traverse across the slope |
| Blue dashed line | Stream or water crossing | Plan momentum entry, check for submerged obstacles |
| Anchor icon | Winch anchor point | Use as route features, not just recovery bailouts |
| Wrench icon | Workshop / repair area | Stage heavy repairs here, not on the open trail |
Reading contour lines is a skill that improves quickly with practice, and it is the difference between picking the right line and getting stuck halfway up a slope. A helpful companion for map orientation is the Over the Hill Canada map guide, which walks through region-specific contour shading and trail heads across the entire game world. Pairing the general map literacy in this section with regional map detail is a fast way to sharpen your planning for the next hard trail attempt.
Planning a Hard Trail Run in Five Steps
Route planning is more efficient when it follows a repeatable process, because hard trails punish improvisation with broken axles, winch overheating, and recovery bills that dwarf any time saved. The five-step routine below is what experienced drivers use to prep for any hard trail, blending map reading, anchor-point scouting, and fuel math into one tight pre-run workflow that works equally well in solo and co-op sessions.
-
Open the map and identify the trail head plus the exit waypoint. Confirm the trail name and difficulty tier before committing.
-
Trace the trail and mark every anchor point, water crossing, and red hazard icon. Each marker becomes a planned checkpoint.
-
Estimate fuel and repair needs based on trail length and surface mix. Hard trails burn more fuel because the engine works harder on climbs, so add a 20-30% buffer.
-
Choose a vehicle with the right tire profile and winch rating. Mud-terrain tires and a high-torque winch dramatically reduce the risk of getting stuck on a hard route.
-
Brief co-op drivers on anchor assignments and recovery priorities. A short pre-run chat saves minutes of confusion when the trail gets rough.
Running through this checklist before departure consistently turns a stressful climb into a controlled ascent, and it also creates a paper trail (so to speak) of what worked. Drivers who skip the planning step usually find themselves improvising at exactly the wrong moment, and the recovery cost is always higher than the time saved.
Driving Techniques for the Toughest Ascents
Advanced driving on hard trails is less about heroics and more about rhythm. The right line, the right gear, and the right use of the throttle at the right moment add up to a run that feels almost choreographed. Drivers who internalize these techniques consistently clear hard trails on their first or second attempt, while drivers who rely on instinct alone usually need three or more tries to learn the same lessons.
Line Choice and Approach Speed
The fastest line on a hard trail is almost never the steepest line. A line that swings wide into a switchback may look longer on paper, but it preserves momentum far better than a straight punch up the middle. Below is a comparison of the two most common line choices and what each one delivers on a hard ascent.
| Line Choice | Pros | Cons | Best For |
|---|---|---|---|
| Direct (steepest) | Shortest distance | Wheel spin, stall risk, high damage | Short, dry climbs under 15% |
| Switchback (wider) | Preserves momentum, lower damage | More distance, requires space | Long, loose, or wet climbs |
| Diagonal traverse | Spreads elevation gain | Side-slip risk on loose surfaces | Slopes with anchor points mid-way |
| Winch-assisted | Guaranteed traction, low stress | Slow, winch heat management | Vertical or technical sections |
Approach speed is just as important as line choice. Drivers who enter a technical section too fast usually lose more time on the recovery than they gained on the entry, and they often take body damage that compounds later in the run. The general rule among experienced over the hill players is to enter each technical section at the slowest speed that still clears the obstacle, then build speed again on the safer ground that follows.
Throttle, Gear, and Momentum Management
Hard trails punish drivers who treat the throttle like an on-off switch. Smooth throttle application keeps the tires in their grip range, while a sudden stab of the accelerator almost always breaks traction on loose surfaces. The same principle applies to gear choice: staying in a lower gear through a technical climb keeps torque available without spinning the engine to redline. For drivers chasing advanced tips, a full breakdown of gear timing and momentum recovery is detailed in the Over the Hill full game guide, which expands the same throttle-management ideas into a broader playstyle framework.
The community has also documented three subtle momentum mistakes that show up on most failed hard trail attempts. First, drivers release the throttle at the crest of a hill instead of carrying speed into the descent, which costs them a free rolling start. Second, drivers brake too early on the approach to an obstacle, then have to re-accelerate through the rough patch where traction is poorest. Third, drivers let the engine bog down in the middle of a climb by staying in too high a gear, and they have no torque left when the trail steepens. Each mistake is fixable with a small adjustment, and the fix compounds across an entire trail.
Equipment, Co-op Roles, and Recovery Strategy
Even with perfect driving technique, the wrong equipment or a confused co-op crew can sink a hard trail run. The hardest routes in over the hill are designed to test every system in the game at once, so the right vehicle loadout, the right co-op role assignments, and a clear recovery plan are all part of the same advanced tips toolkit. The goal is to make every recovery an exception rather than a routine.
Vehicle Loadout Recommendations
A good loadout for a hard trail focuses on traction, durability, and recovery tools. The table below summarizes the equipment choices that experienced drivers most frequently recommend for climbs in the 21-32% gradient range, based on shared community testing.
| Equipment Slot | Recommended Choice | Why It Matters |
|---|---|---|
| Tires | Mud-terrain or all-terrain | Better bite on loose rock and wet grass |
| Suspension | Reinforced off-road | Absorbs impacts, prevents bottoming out |
| Winch | High-torque, long cable | Reaches distant anchor points on switchbacks |
| Engine | Mid-to-high displacement | Maintains low-end torque on climbs |
| Fuel | Full tank + reserve can | Hard trails burn 20-30% more fuel than easy trails |
| Repair kit | Planks, spare parts | Staged at workshops to minimize trail downtime |
Planks deserve a special mention because the official store description highlights them as a key traversal tool, and on hard trails they are often the difference between clearing a gap and turning back. A driver who arrives at a chasm with no planks has effectively ended the run, so a careful pre-departure check of plank inventory is part of the same discipline as fuel and winch readiness.
Co-op Roles and Recovery Protocol
Co-op play in over the hill works best when each player has a clear role before the trail begins. The most efficient crew structure assigns one driver, one spotter, and one recovery specialist, with the fourth player rotating through these roles as needed. The spotter calls out obstacles, anchor points, and surface changes, which frees the driver to focus on line and throttle. The recovery specialist stages the winch and planks so they are ready the instant a vehicle gets stuck.
When a recovery becomes necessary, the protocol below is what experienced crews follow to minimize time lost. Skipping winch tension checks, failing to mark the recovery point on the map, or leaving planks half-staged on loose gravel typically costs a crew 10–15 extra minutes per incident, and the ripple effect compounds across later obstacles where fuel and tire wear are already strained. Drivers who treat each step as optional almost always find that a second recovery — this time with two stuck vehicles — takes three to four times longer to clear than the original problem would have.
-
Stop on stable ground before attempting any winch or plank recovery. Pulling a stuck vehicle from unstable ground just creates two stuck vehicles.
-
Communicate winch direction and tension before powering up. A mis-aimed winch cable can damage the anchor point or snap under load.
-
Re-stage planks and fuel after every major recovery. A clean staging area makes the next obstacle easier to clear.
-
Mark the recovery point on the map. Future runs can plan around the failure or approach it from a different line.
For drivers who want a fuller picture of co-op play, vehicle unlocks, and trail completion, the Over the Hill 100 percent completion guide covers the challenge trails that often share terrain with the hard routes discussed here. Reading both guides together gives a complete picture of where the hardest content lives and how it ties into the broader completion path.
Putting It All Together: A Sample Hard Trail Run
Theory only carries a driver so far; the real test is whether the planning, map reading, and driving techniques work together on an actual trail. The walkthrough below describes a representative hard ascent using the same approach an experienced driver would take, and it shows how each of the previous sections feeds into a clean, repeatable run.
Pre-Departure Checklist
Before leaving the trailhead, the driver opens the map and marks every anchor point along the chosen route. They confirm fuel, planks, and repair kits, and they brief co-op teammates on role assignments. A quick scan of the in-game weather indicator confirms whether rain has made the upper section slippery, which can shift the planned line. According to community reports, rain events add roughly 5-7% effective gradient to hard trails because of reduced surface friction, so the same route in dry conditions may be very different from the route in wet conditions.
Mid-Trail Adjustments
Halfway up the climb, the driver encounters a patch of loose shale that was not visible from the trailhead. Rather than pushing straight through, they swing wide into a switchback line that uses a nearby winch anchor as a midway assist. The spotter calls the anchor distance and angle, the recovery specialist preps the winch, and the driver carries just enough momentum to engage the cable. The result is a controlled ascent that costs less time than a direct attempt would have lost to wheel spin. The same pattern repeats at the next two technical sections, and the crew summits with fuel and repair kits still in reserve.
After the Run
Once the exit waypoint is reached, the driver checks the map for unmarked paths and points of interest. Hard trails often hide collectibles like meteorites and regional passports, and the Steam achievement tracker for over the hill notes that 43.8% of players have unlocked the Explorer achievement for discovering 20 points of interest. Drivers who combine hard trail runs with collectible hunting extract more value from every ascent, and the map markers left behind make future runs even easier to plan.
Advanced Tips for Repeat Hard Trail Runs
Once a driver has cleared a hard trail once, the next run becomes a refinement exercise. The advanced tips in this section are the small adjustments that turn a clean run into a fast, low-damage run, and they are what separates a one-off success from a consistent record-breaker. These tips also pair well with the broader tips catalog in the Over the Hill general guide, which covers controls and baseline driving habits for newer players.
Refining Line Choice After a First Run
The first attempt at a hard trail rarely finds the optimal line, because every obstacle reveals information the map could not. Drivers who take screenshots or map notes after each failed section can re-approach the trail with a better plan on the second try, and the second run is usually a full minute or more faster than the first. A simple habit of marking the line that worked (and the line that did not) creates a personal reference library that compounds over dozens of trails.
Managing Winch Heat and Fuel Burn
Winch heat and fuel burn are the two resources that limit how aggressively a driver can push on a hard trail. Winch heat builds up under continuous load, and a winch that overheats mid-climb can leave a vehicle stranded with no recovery option. The community-recommended pattern is to use the winch in short bursts, allow it to cool during flatter sections, and switch to momentum-driven driving whenever the gradient permits. Fuel burn is managed the same way: lower gears and steady throttle keep the engine in its efficient band, while aggressive acceleration burns fuel far faster.
Reading the Community and Patch Notes
Hard trails are occasionally rebalanced by the developer, and the difficulty of a given route can shift slightly after a patch. Players who follow the pinned FAQ thread on the over the hill Steam community tend to learn about rebalances early, which lets them adjust their route planning before the next attempt. Pairing the official channel with community discussion is the most reliable way to stay current on hard trail tactics.
Frequently Asked Questions
What counts as a hard trail in over the hill?
Hard trails in over the hill generally fall in the 21-32% gradient range, feature mixed surfaces like loose rock and deep ruts, and pack obstacles tightly together. They are the tier above medium trails and below the very rare expert routes.
Should I run hard trails solo or with co-op?
Co-op makes hard trails dramatically easier because a dedicated spotter calls line corrections on 25%+ grades while a partner handles winch recovery, removing most roll-over risk. Solo drivers can still clear them by scouting in free roam first, noting every red hazard marker and anchor point, then committing to straight-line throttle attacks on each climb.
What is the single best upgrade for hard trail driving?
The single best upgrade for hard trail driving is mud-terrain tires paired with a reinforced suspension, since they keep the vehicle planted on loose surfaces and absorb rut and rock impacts throughout the trail. A winch is a strong second because it unlocks anchor-assisted ascents when terrain becomes too steep.
How do I read the map for hard trail planning?
Reading the map in over the hill for hard trail planning starts with locating the trail's difficulty tier color, then tracing the route through marked Points of Interest and exit markers. Off-map exploration can reveal hidden meteorites and crates, so always cross-reference the trail's path with your current region guide before committing to a route.
How do I read the map for hard trail planning?
Treat the Hard tier map as a layered read: check the colour band on the border to confirm Hard, then count contour lines, find anchor points, and locate red hazard markers. Tighter contours (4+ within 50 m) flag 25%+ grades, anchors become mandatory winch-assisted route features, and red markers mean you must approach from below — sideways onto a loose-rock shelf almost always triggers a high-centre.